In order to form a company in Hong Kong, you must submit an incorporation form (NNC1) either online or by paper submission. As we all know, incorporating a company in Hong Kong can be intricate yet simple. It can be quite confusing in terms of submitting the necessary documents if you don’t know the exact details. Hence, this article will guide you to prepare the incorporation form step by step so you can have a better grasp on this subject.
Step 1
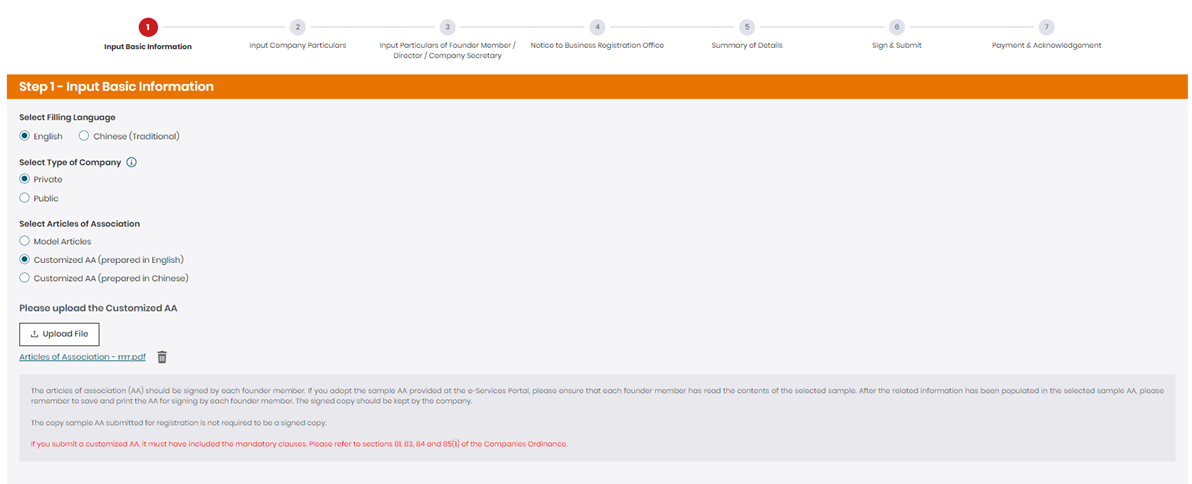
First, login to e-Registry after you have created a personal account. Once you signed in, scroll down and click Incorporation, then select Local Company – Company Limited by Shares (Form NNC1). After that, you will be directed to the next page where it says Input Basic Information, select English as filling language and Private as type of company then upload the Articles of Association you have prepared in advance. Click Save & Next.
Step 2
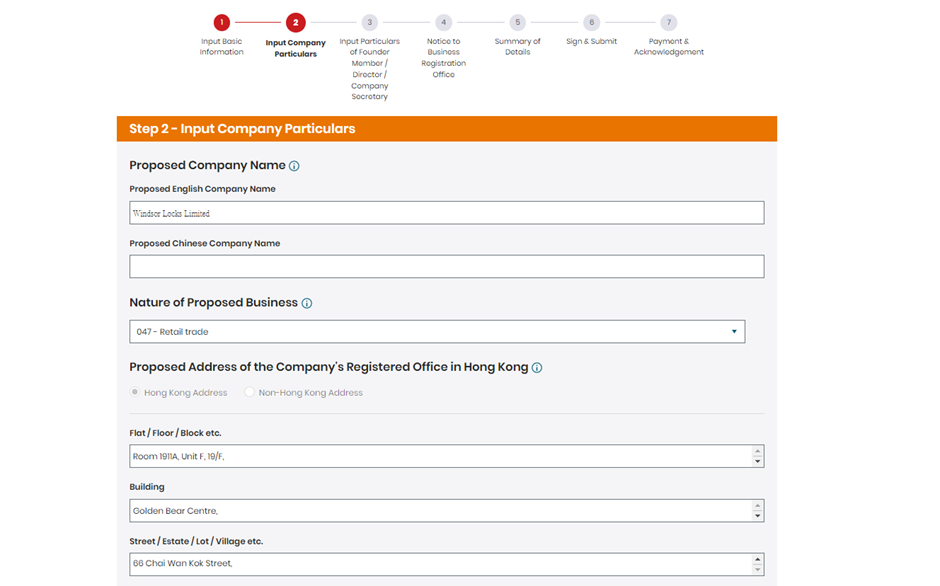
The next page is Input Company Particulars, put in your proposed company name in English and Chinese (if applicable). Afterwards, select the Nature of Proposed Business. There is over 90 categories for selection, make sure you pick the one that suits your business the most. Next, simply fill out the Proposed Address of the Company’s Registered Office in Hong Kong. The address is normally the one provided by your company secretary; you can also use any commercial addresses in Hong Kong as your registered office address. Furthermore, you may add the contact information of your company such as an email address and a Hong Kong contact telephone number but they are both optional. Lastly, fill out your company’s Share Capital and Initial Shareholdings. For class of shares, select ordinary (unless it’s preference). Put in the amount of proposed shares under Total Number of Shares Proposed to be Issued, currency, Total Amount of Share Capital to be Subscribed by Founder Members and Total Amount to be Paid Up or to be Regarded as Paid Up on the Shares Proposed to the Issued. Click Save & Next. Please see references below.

Step 3
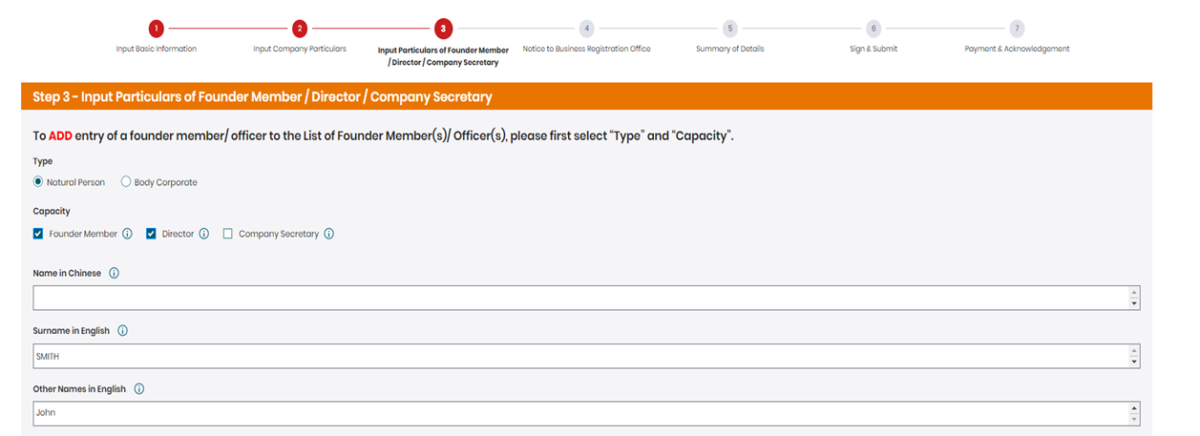
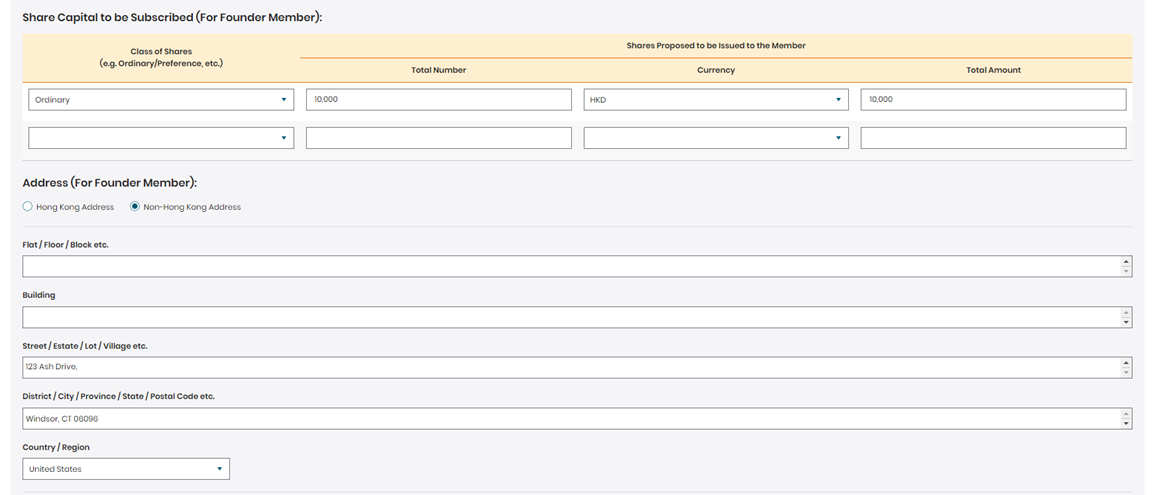
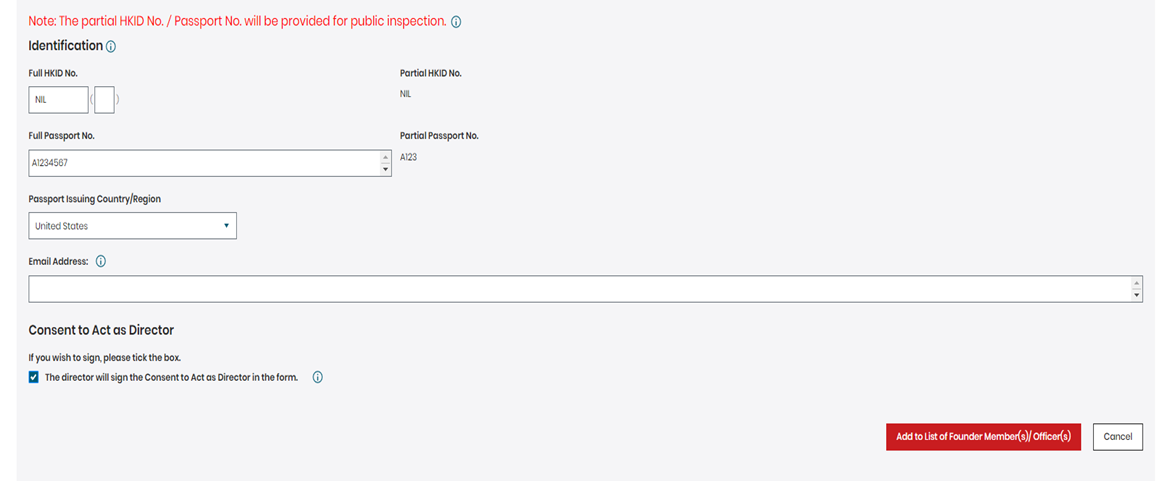
Moving on to the next page – Input Particulars of Founder Member / Director / Company Secretary; you will add information of the founding member and director of your company (in most cases it’s yourself), make sure you select Natural Person for Type. Fill out your surname and given name accordingly; you can omit the rest of the below like previous name(s) and alias. Put down the Share Capital to be Subscribed, it should be the same as the previous page. Next, fill out your residential address for Address (for founder member). The residential address you are providing should match with your address proof. You will see two more address sections below which are Correspondence Address (For Director) and Usual Residential Address (For Director). The address for both section should be the same as the first section. Not to mention, the Usual Residential Address (For Director) section will be withheld from public inspection. Finally, fill out your personal documents information such as your passport number and issuing country. If you don’t have an HKID, simply put NIL. The email address section is optional and make sure you tick the consent box below before moving on to the next page. Click Add to list of Founder Member(s)/Officer(s). Please see references below.
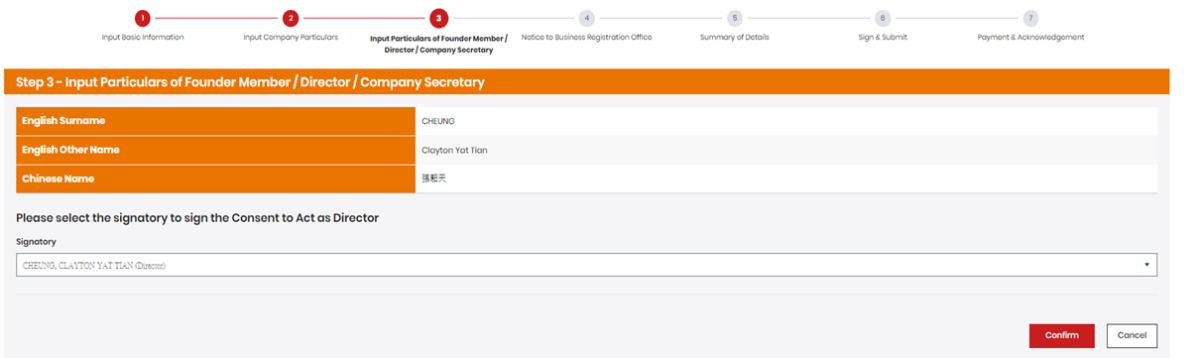
Next, you will be required to digitally sign the consent to act as director. You can simply click on the arrow button under the Signatory section then click Confirm.
Step 4
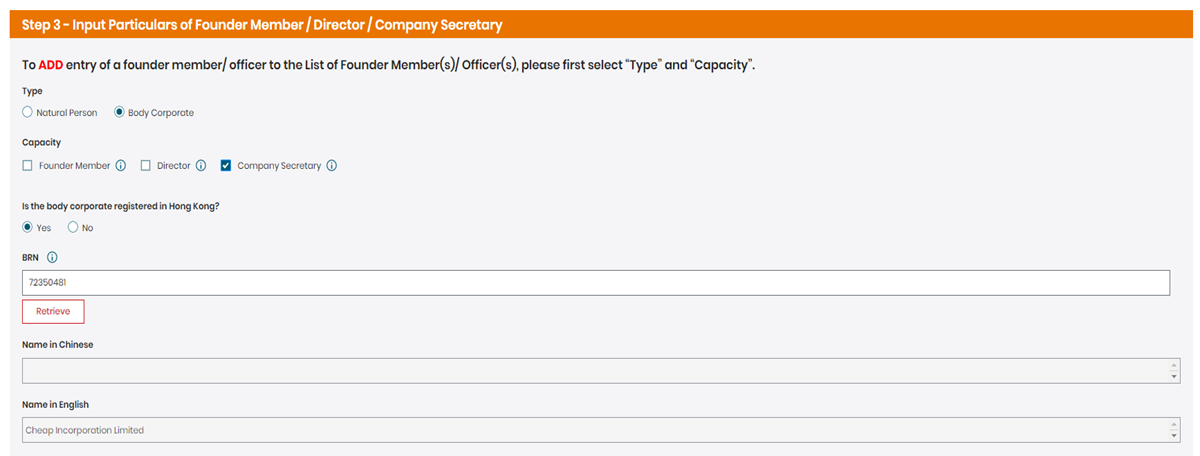
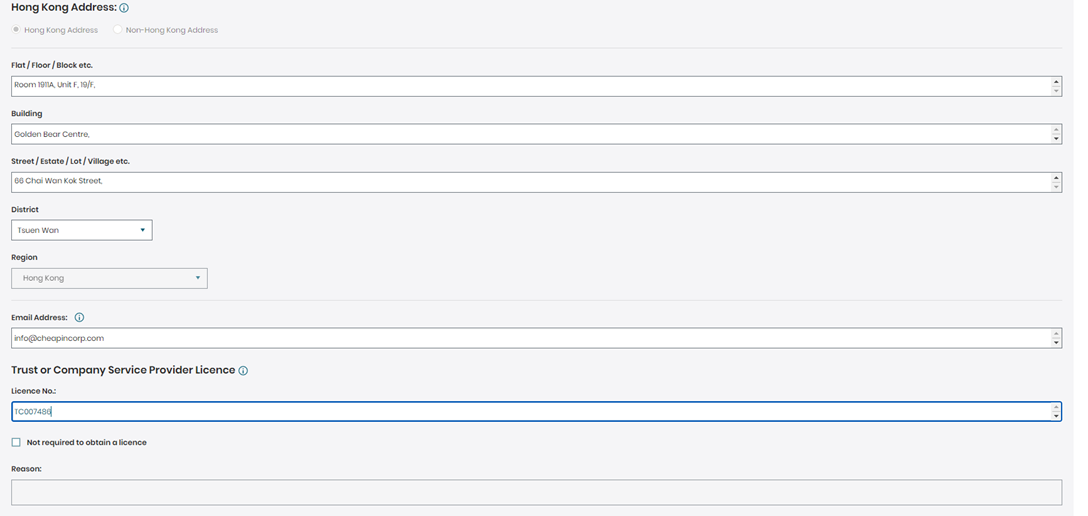
After that, you will add your company secretary information. Choose Body Corporate for Type then select Company Secretary for Capacity. Choose Yes for Is the body corporate registered in Hong Kong? Simply put in your service provider’s company number, also known as business registration number and the company name will automatically pop up. After that, put in your service provider’s physical & email address below. Make sure to put in their TCSP license number as well. Click Add to list of Founder Member(s)/Officer(s) then click Save & Next. Please see references below.
Step 5
You will be directed to the next page where you need to sign the statement as founder member after you added the founder, director and company secretary information. Click Save & Next. Once you are on the next page where it says Notice to Business Registration Office, click no. Clicking no means you only wish to obtain 1-year Business Registration Certificate, yes means 3 years. Click Save & Next.

Step 6
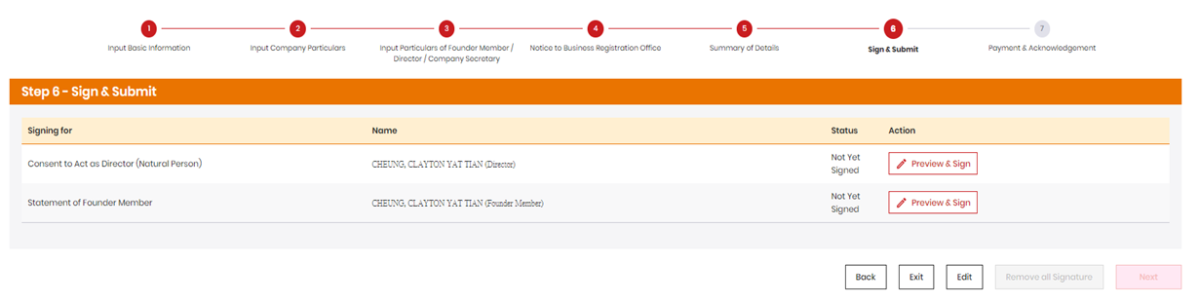
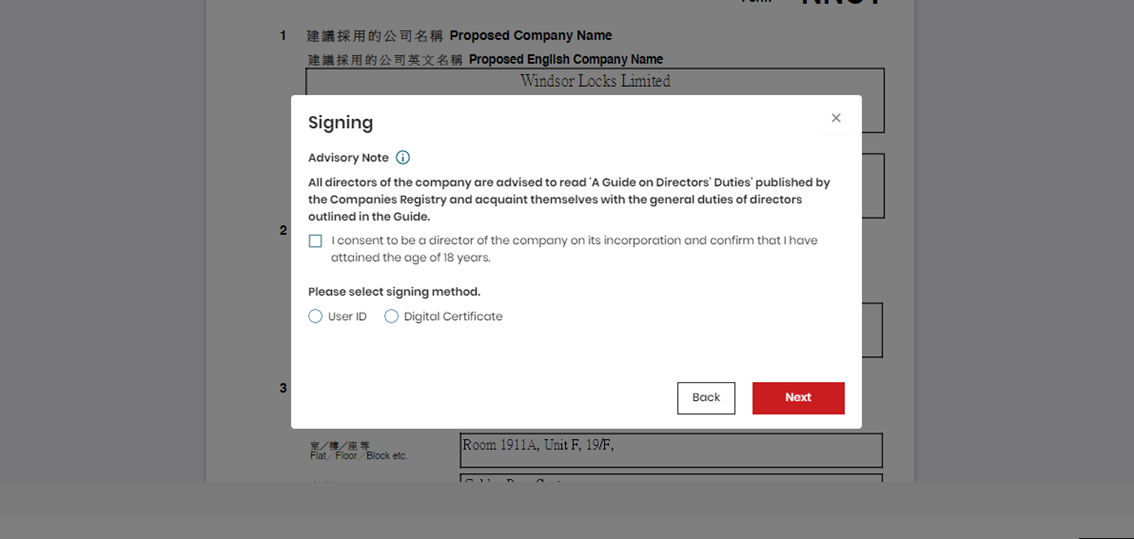
After that, you will be directed to Summary of Details. This is a crucial step as this is the chance for you to double check your personal and company information before proceeding to signature. After you have scrutinized everything, click Next. Then, you will be directed to the second to last stage of the process which is to digitally sign the Incorporation Form (NNC1) as a founding member and director. After you sign, click Next. Step 6, this is the absolute final chance for you to check your document before submission. Click Submit after you have double-checked everything. Please see the reference below.
Step 7
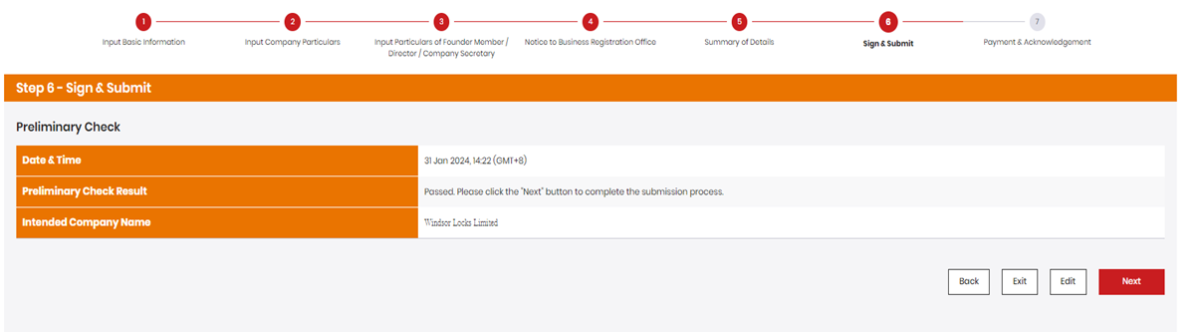
If your application has passed its preliminary checking, it will say Passed. Please click the “Next” button to complete the submission process. Click the Next button.Please see the reference below.
Step 8
At the final last stage of the incorporation process which is payment and acknowledgement. You can either pay by credit card or you can pay via deduct from account (you must first top up your e-registry account first). Click Pay. You will receive a confirmation email from the Companies Registry after payment or you can also download/print out the receipt afterwards.
This concludes the step-by-step guide in how to incorporate NNC1 form by yourself. We hope this article is helpful to you. If you have further questions or would like to form a company with us, please do not hesitate to contact us via email at info@cheapincorp.com or message us at +852 5404 0902 on WhatsApp.
